

Interior design is one of my favorite things. I could spend HOURS on Pinterest (and totally have), pinning ideas to make my own, future house plans, etc. I actually used to write a DIY/crafting/lifestyle blog a long time ago (it still exists! Go find it!), so I’ve always dreamed of having a house to design!
If you follow me on Instagram (I mean – if you’re not…why!? I share lots of fun pictures!), then you’ll know that we moved into a house (!) in the late Fall. Wedding season was wrapping up, so it was the perfect timing & we’ve spent the last few months working on it & making it ours!! The previous owner did a TON of work to the main spaces – including recessed lighting, GORGEOUS hardwood floors & an updated bathroom! However – he didn’t ever touch the master bedroom & bathroom (honestly probably because he knew just HOW much work it was going to entail!).
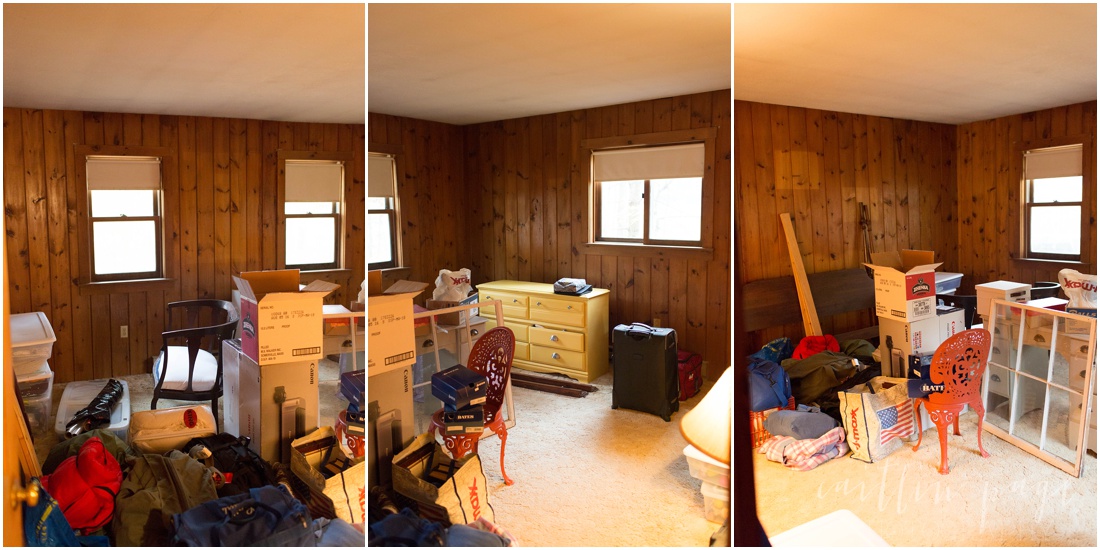
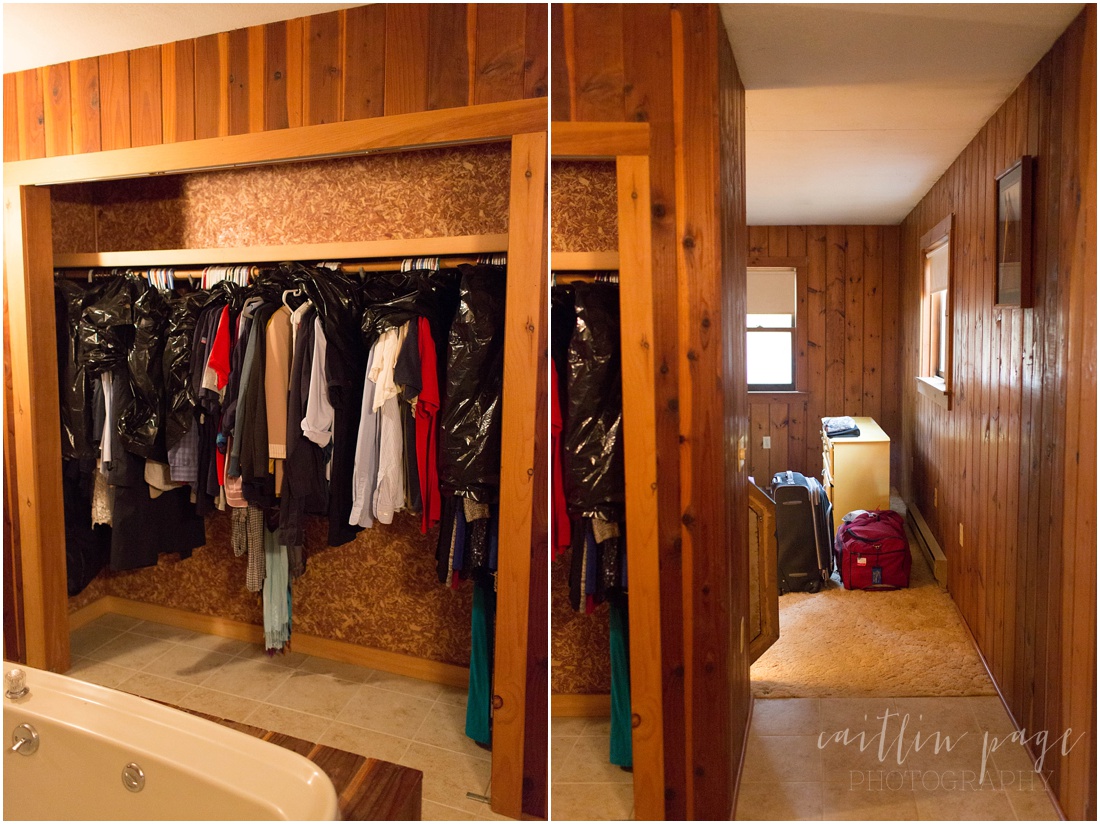
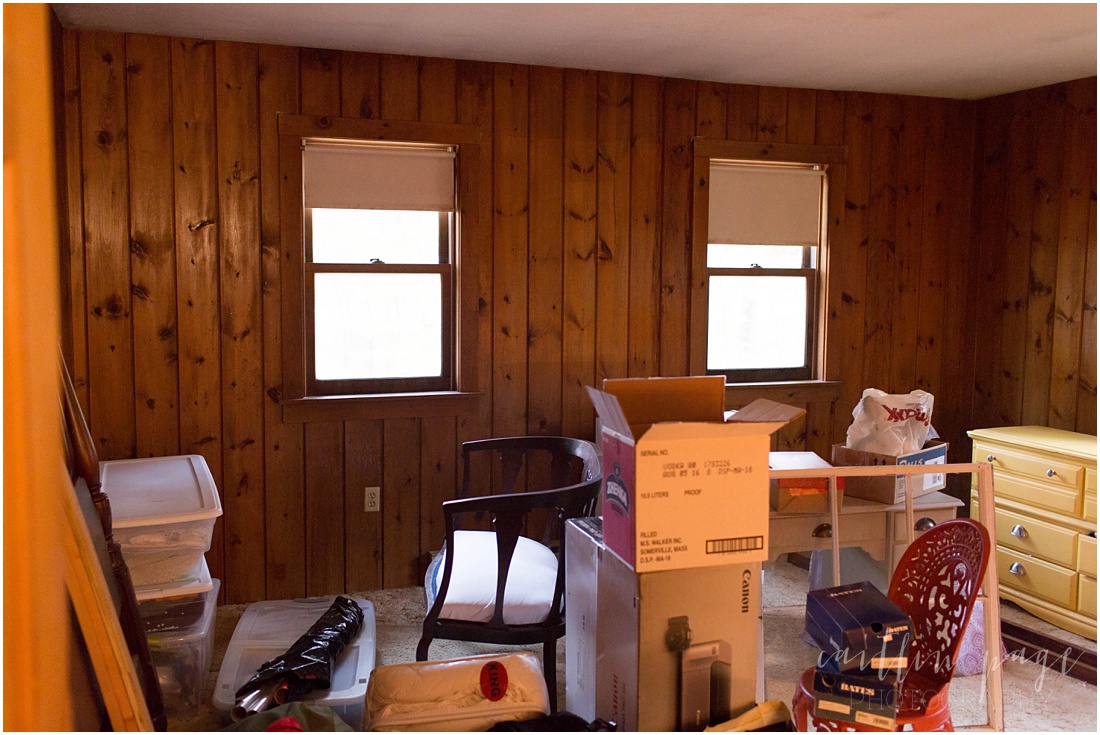
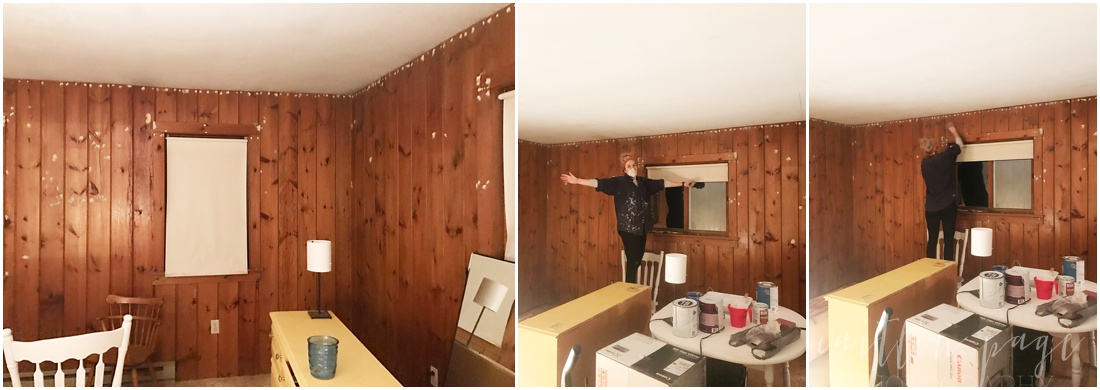
Since we moved in, we’ve been using my future office as our bedroom (which is perfect because there are some seriously great built in cabinets in there!), our guest bedroom has been the office & the master bedroom & attached bathroom were basically our storage. It should be mentioned that these photos were taken 2 days after we moved in so yeah…hot mess express.

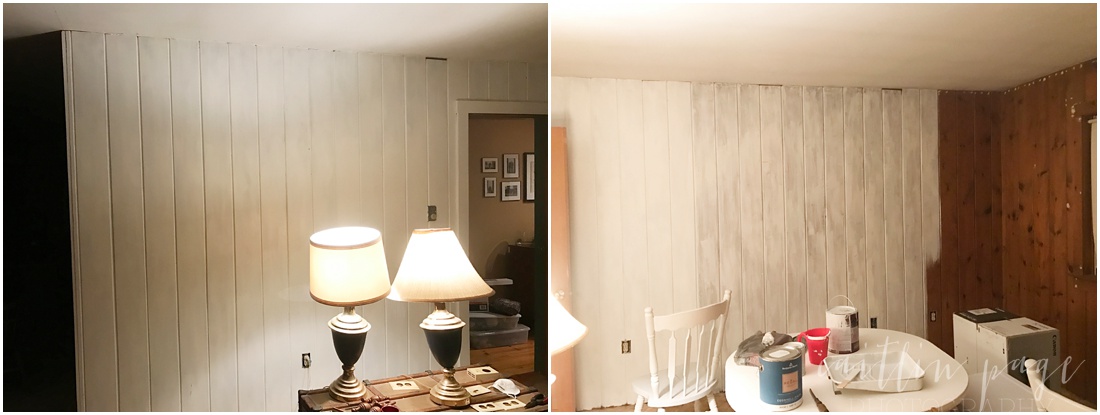
UNTIL. One day I had some primer out & decided to see just how many coats of paint were going to be used on these walls…and well, it kind of snowballed from there. You know the book, “If You Give A Mouse A Cookie”? Yeah, it went a little like that. When we originally looked at this house, I could immediately see these walls painted bright white – so I just did it!
One day down the road, we will rip these boards out & drywall them, gut the bathroom & completely renovate this part of the house. However, until we hit the jackpot, paint will have to do!!
Since the walls weren’t JUST paneling, but ACTUAL wood, each board required patching & sanding. DAYS OF THIS. DAYS AND DAYS AND DAYS. In the meantime, we ripped the carpet out & pulled allllllll the staples.
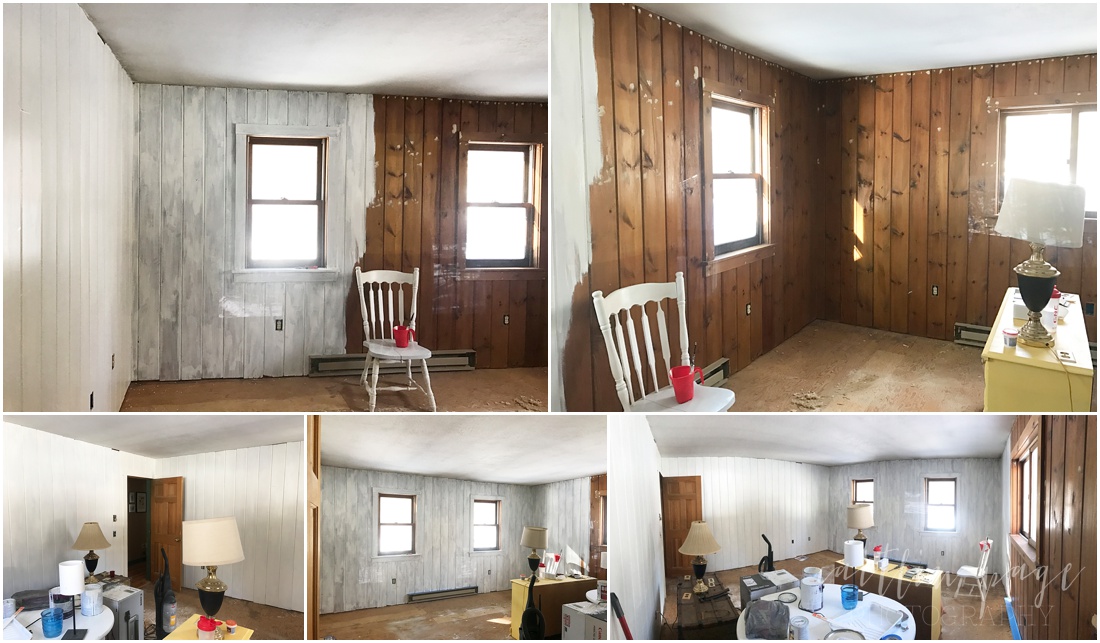
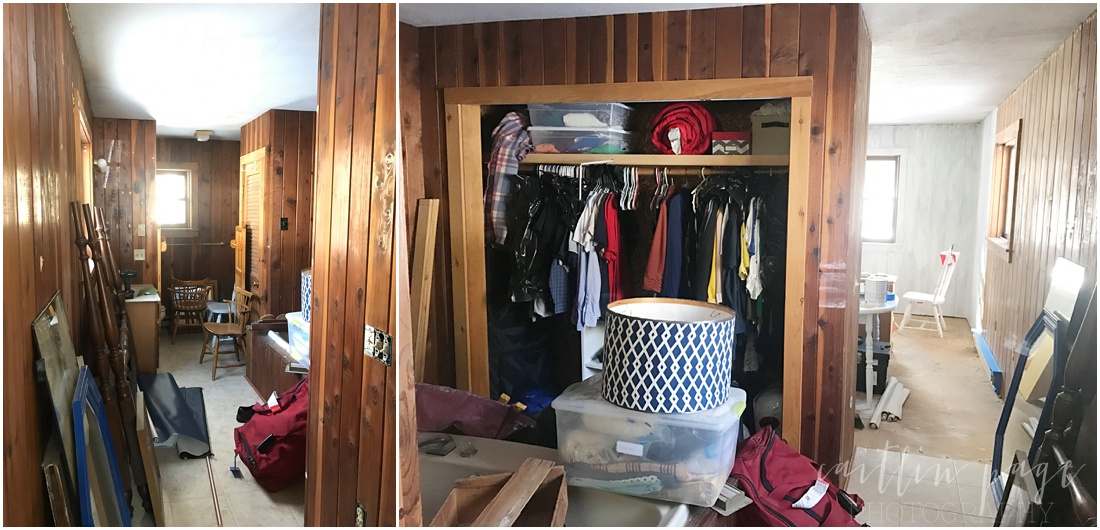
Even with only one coat of primer on the walls, it was so obvious how much better it was going to look. Oh, and I didn’t intentionally take these terribly messy photos, it’s just how it happened. Oh, and did I mention that 3/4 of our clothes were STILL PACKED!? Right up there in that closet, those suitcases & that dresser.
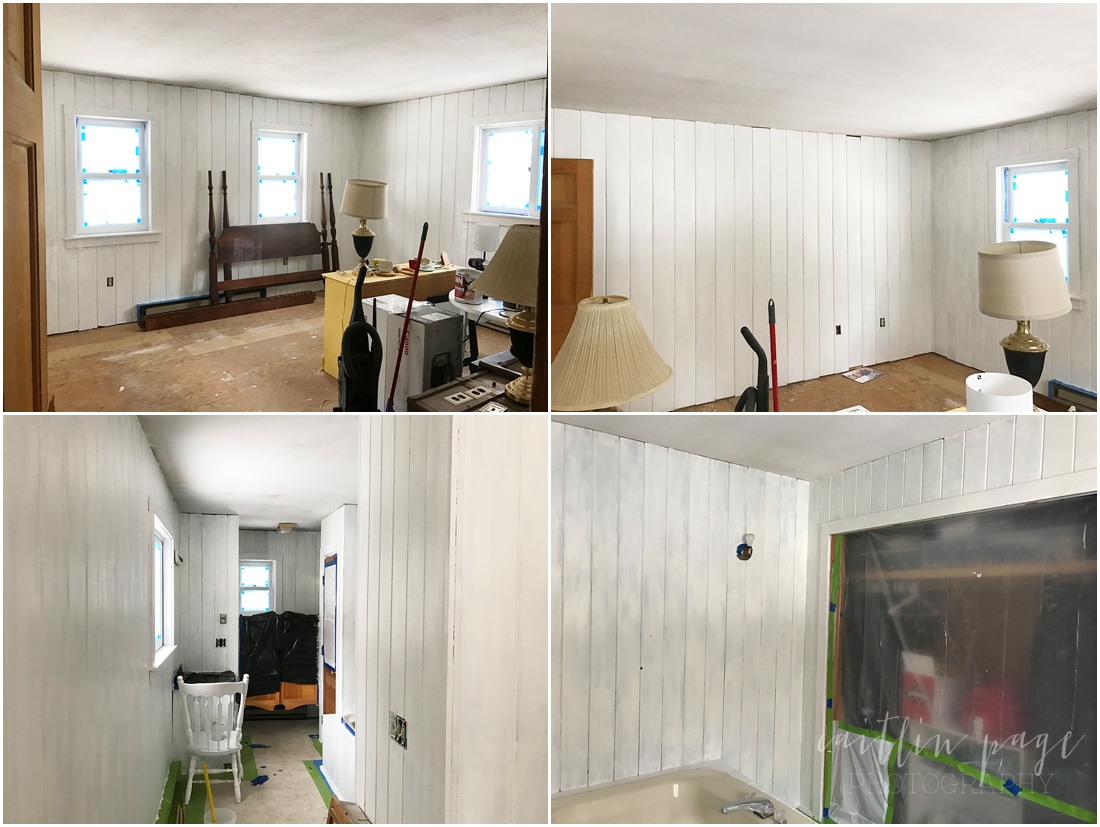
SO. Each board took 2 coats of primer & 2 coats of paint. All by hand with a paintbrush. I honestly couldn’t stretch my right hand out each night that the painting was finished & still have stiffness in the knuckles some mornings (because I’m 100). I also painted the ceiling & painted the subfloor. Part of the full renovation will include new floors throughout the space, so to save money, we just painted & sealed the floors using this tutorial as a guide. Another two coats there plus some poly to seal it!!

While we were at it, the vanity got painted & while I considered leaving the sink the way it was, the color just looked terrible in the space and the sink itself wasn’t in the greatest shape, so THAT got painted too!! Originally the vanity was looking reaaaallllll little boy blue so it got toned down with a few coats of gray stain. #justcallmejoannagaines
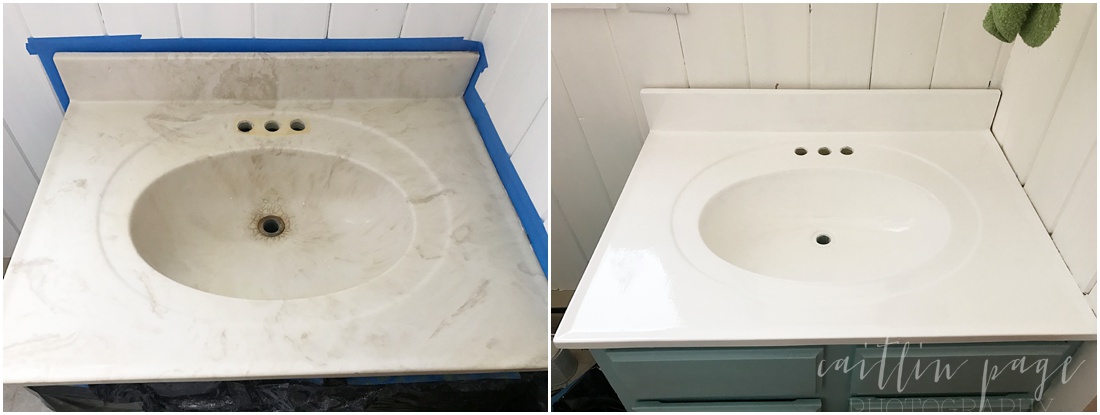 For the sink, I used a special paint called Rustoleum Tub & Tile & used this tutorial to paint it. Once it was done, I was SO happy that it had been painted.
I got into a fight with the faucet when I was removing it (if you follow me on Snapchat you already know this and watched my obscenity filled story), and I kind of hated it anyways SO I went with this faucet instead. It’s arrived and been installed & so far we really like it!!
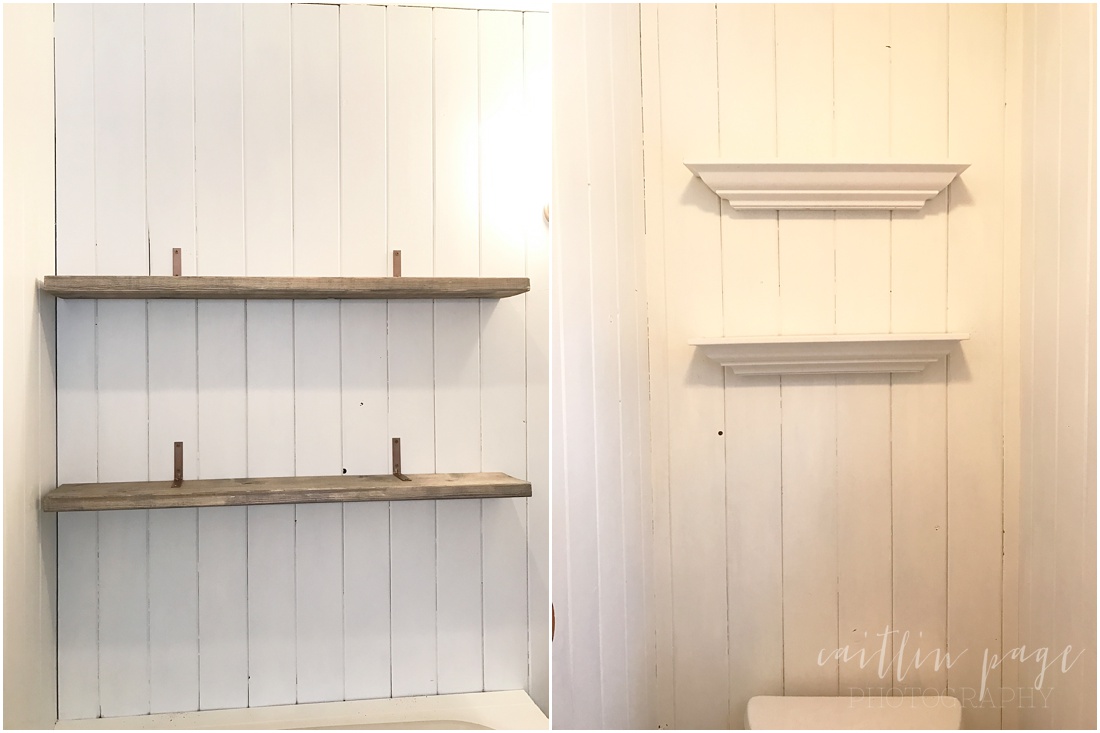
I built a pair of shelves for over the tub (this tutorial) & installed some oldies that we had from our first apartment over the toilet.
The windows got frosted so that we didn’t flash our neighbors (we wanted to let the most light into the bathroom & this was the easiest way!). It was super easy to do & I highly recommend it because the amount of light let in is barely any different!!
We officially moved our bed into here Wednesday night!!! It was the best night of sleep we’ve had since we moved in 4 months ago!! I can’t wait to show you how different the space looks!!!


Comments +